Understanding how to digitize embroidered design is the essential first step in turning artwork into machine-ready embroidery, which sets the foundation for stitch quality, sew-out speed, and the long-term durability of your finished pieces. From mastering the embroidery digitizing process to choosing compatible machine embroidery digitizing software, your approach shapes how clean edges look, how evenly stitches lay, and how quickly you can optimize a project from concept to production. You’ll also learn about embroidery file formats (DST, PES, EXP) and how the right choice affects compatibility across brands, hoop sizes, and machine firmware, ensuring consistent results regardless of equipment. A solid focus on digitizing stitches and fill types helps you balance edge sharpness with fabric stability, reducing puckering on diverse textiles while maintaining thread integrity through multiple wash cycles. With tips for clean digitization and a clear workflow, you’ll deliver consistent results your embroidery machines can read reliably, while building a scalable library of reusable designs.
A complementary way to frame the concept is converting artwork into stitch data, the underlying method that powers dependable sew-outs. Viewed through an LSI lens, the focus shifts to vector-to-stitch conversion, path optimization, and data integrity, rather than brand names or specific software titles. This approach still touches on embroidery file formats, color management, and compatibility with common embroidery systems, but it emphasizes scalable workflows and predictable results across fabrics.
digitize embroidered design: Why it matters in the embroidery digitizing process
digitize embroidered design is the essential first step in turning artwork into machine-ready embroidery. Whether you’re creating a logo, a decorative motif, or an intricate illustration for a garment, digitizing determines how the final stitches will look, how quickly they sew, and how well the design will hold up on different fabrics. In the broader embroidery digitizing process, this step translates vision into stitch data that a machine can read. By planning stitch types, directions, and densities, you set the foundation for clean edges, even coverage, and durable performance across fabrics and machines. Adopting a deliberate approach to digitizing is how professional designs achieve consistent sew-outs and repeatable colorways.
Understanding the embroidery digitizing process helps you anticipate challenges before you sew. Path planning, stitch balance, underlay, and proper stop/start points impact both appearance and fabric behavior. If you neglect underlay or misjudge density, you may see fluttery outlines, gaps, or puckering during production. With a solid digitizing approach, you can optimize stitch flow for speed and reliability, enabling faster sew-outs and reduced thread breaks. This makes digitizing more than a technical step—it’s a core craft that directly influences final quality and production efficiency.
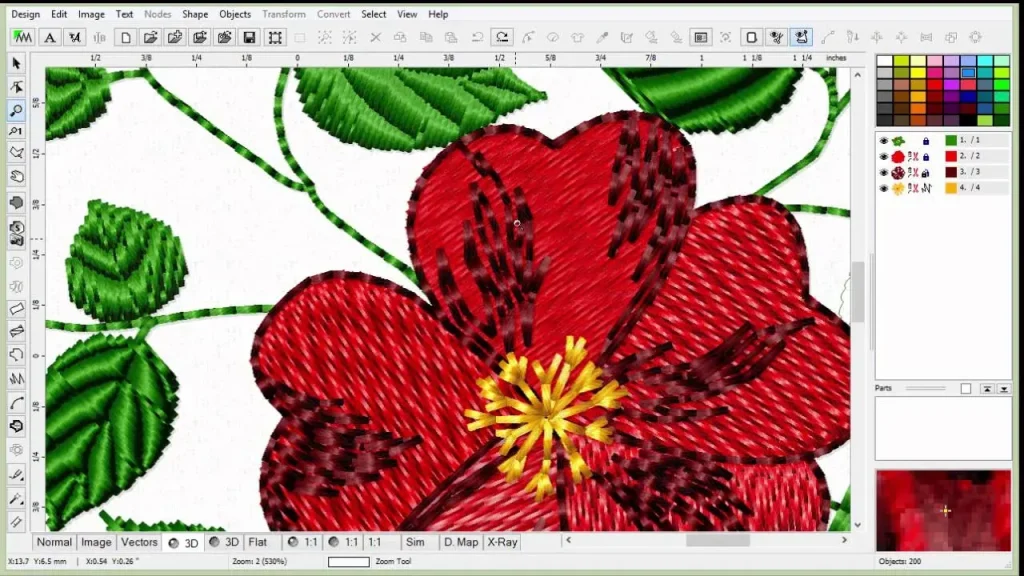
Choosing the Right machine embroidery digitizing software for your projects
Selecting the right machine embroidery digitizing software depends on your workflow, budget, and the types of designs you create. High-end professional suites offer advanced tools for underlay, stitch types, density control, and path optimization, while entry-level options deliver a gentler learning curve for beginners. When evaluating software, look for a clean interface for assigning stitch types (satin, fill, running, triple-step), robust underlay and density controls, and efficient path optimization that reduces thread breaks.
Import options are essential, as most designs start from vector or bitmap artwork. The ability to convert layers into embroidery-ready objects, along with strong support for embroidery file formats (DST, PES, EXP) and other common formats, ensures you can prototype quickly. Tutorials and active communities help accelerate learning, especially when you’re digitizing multiple colorways or iterating on a design. As you gain experience, you’ll discover which tools speed up the workflow without compromising stitch quality.
Understanding digitizing stitches and fill types
Digitizing stitches and fill types define texture, coverage, and fabric interaction. Satin stitches provide crisp outlines but must be tuned for density and compensation to avoid gaps, while fill stitches cover larger areas and depend on density, angle, and pattern choice to achieve even coverage. Running stitches offer delicate detail and require precise spacing to prevent visible gaps, and specialty stitches can add texture when used judiciously.
Tips for achieving balanced digitizing stitches come from underlay planning, proper density, and thoughtful stitch direction. Start with a solid underlay to stabilize the fabric, then adjust density to balance coverage with fabric stiffness. Use run-in or jump stitches strategically to minimize thread breaks and sew-out time. Consider stitch direction to minimize distortion and ensure the design reads cleanly across fabrics. Designers often experiment with digitizing stitches and fill types to achieve the desired texture.
Embroidery file formats you should know: DST, PES, EXP and more
Saving work in a compatible embroidery file format is a crucial part of the digitizing workflow. Different brands support formats such as DST, PES, EXP, JEF, VIP, VP3, and more, each carrying stitch data, color stops, and sometimes metadata. When digitizing embroidered design, you typically export multiple format variants tailored to your equipment and hoop. Preserving layering or object-based information helps when your workflow includes multi-color changes and re-coloring later.
Maintaining a library of common formats and verifying stitched samples on actual fabric is essential. For many home and small business machines, DST and PES provide a practical balance between compatibility and feature support. Always export the color stops clearly to guide thread changes in production, and keep a master project to preserve editable layers for updates and revisions.
Tips for clean digitization to improve sew-out quality
Clean digitization relies on thoughtful planning and precise execution. Plan your design with layers in mind, break complex shapes into manageable components, and ensure paths are smooth to reduce thread breaks. Use solid underlay to stabilize the fabric and improve coverage, and avoid unnecessary nodes when converting vectors to stitches.
Label color stops clearly and test sew-outs on scrap fabric to validate density, underlay, and stitch types in real-world conditions. These practices are central to tips for clean digitization, helping you reproduce consistent colorways and maintain stitch balance across fabrics. By validating early, you save time in production and ensure a professional sew-out from the first try.
From artwork to stitch-out: a practical workflow for production-ready embroidery
This workflow takes you from artwork to stitch-out with a focus on reliability and repeatability. Prepare the artwork by ensuring high resolution, simplifying complex areas, and removing background noise. Decide on the stitch plan by outlining crisp edges and choosing appropriate stitch types and color changes before you begin digitizing.
Digitize the design by placing stitches, applying underlay, adjusting density, and refining path directions. Validate through a test sew-out on similar fabric and hoop, then export in the required embroidery file formats, maintaining a master project with all layers intact for future edits. A well-documented workflow integrates tips for clean digitization and ensures you can deliver consistent results across machines and fabrics.
Frequently Asked Questions
What does digitize embroidered design mean and why is the embroidery digitizing process important?
Digitize embroidered design means converting a flat artwork into a stitch-based file that an embroidery machine can sew. The embroidery digitizing process covers path planning, stitch types and densities, underlay, stitch balancing, and metadata. Getting this right affects sew-out appearance, sewing speed, and how well the design holds up on different fabrics.
Which machine embroidery digitizing software is best for digitize embroidered design and what features should I look for?
Choosing machine embroidery digitizing software depends on your workflow, budget, and design complexity. Look for a clear interface for assigning stitch types (satin, fill, running), strong underlay and density controls, path optimization, and robust import options. Also verify it supports common embroidery file formats and can export DST, PES, EXP, and other targets.
Which embroidery file formats should I save when digitize embroidered design, and how do DST, PES, EXP fit into your workflow?
Embroidery file formats you save in determine compatibility with your machine and workflow. DST and PES are widely supported and balance compatibility with features like color stops and multi-color changes; EXP and other formats preserve additional metadata when supported. Create a master project and export multiple format variants to fit different equipment.
What are digitizing stitches and fill types, and how do I apply them when digitize embroidered design?
Digitizing stitches and fill types describe how outlines and shapes are constructed. Satin stitches yield crisp edges, fill stitches cover large areas, and running stitches handle light details; underlay stabilizes fabric and improves coverage. Density, angle, and pattern choices affect stitch balance and fabric distortion.
What are tips for clean digitization to ensure professional sew-outs when digitize embroidered design?
Tips for clean digitization include planning with layered design in mind, keeping paths smooth, using proper underlay, avoiding unnecessary nodes, testing sew-outs on similar fabric, and labeling color stops for repeatability.
What is a practical workflow from artwork to stitch-out for digitize embroidered design?
Workflow from artwork to stitch-out: prepare the artwork, decide the stitch plan, digitize with appropriate underlay and density, validate with a test sew-out on similar fabric, and then save/export to the required embroidery file formats. Maintain a master project for future edits and iterations.
| Aspect | Key Point | Why it matters |
|---|---|---|
| Understanding digitizing | Converts a flat image into a stitch-based file with defined stitches, directions, densities, and underlay. | Determines final look, sewing speed, and fabric durability across different materials. |
| Core components of the process | Path planning; stitch types and density; underlay; stitch balancing; file formats and metadata. | Shapes how the design sews and affects stability, coverage, and machine compatibility. |
| Software selection | No one-size-fits-all solution; depends on workflow and budget. Look for clear stitch-type tools, underlay/density control, path optimization, and format support. | Affects learning curve, speed, and quality of the final sew-out. |
| Embroidery file formats | DST, PES, EXP, JEF, and others; color stops and layering; export variants for different equipment. | Crucial for machine compatibility and accurate color changes; helps keep projects portable. |
| Stitches and fill types | Satin, fill, running, and specialty stitches; control density, angle, and pattern. | Affects edge crispness, coverage uniformity, and fabric behavior under stitch stress. |
| Underlay and balance | Underlay stabilizes fabric; balance ensures even appearance across fabrics. | Prevents distortion, puckering, and gaps; improves overall sew quality. |
| Workflow and testing | Prepare artwork, decide stitch plan, digitize, validate with a test sew-out, and save/export. | Promotes consistency and reduces production issues. |
| Tips for clean digitizing | Plan with layers, keep paths smooth, use underlay, minimize nodes, test sew-outs, label color stops. | Improves quality, editability, and repeatability of projects. |
| Storage and archiving | Keep native project files and export formats; maintain an organized library for future edits. | Speeds collaboration and ensures long-term project integrity. |
Summary
In digitize embroidered design workflows, you lay the foundation for machine-ready embroidery by converting artwork into stitch data. With thoughtful digitizing, you achieve cleaner edges, better stitch coverage, and more reliable results across fabrics and machines. By understanding the digitizing process, selecting the right software, and applying deliberate decisions about stitch types, underlay, density, and file formats, you can deliver professional designs that sew consistently. Regular test sew-outs and an organized library of embroidery file formats help keep production efficient and scalable. Digitize embroidered design is a craft that elevates your entire embroidery pipeline from concept to production, driving faster sew-outs and higher-quality outcomes.