Custom Roll Up Banner Printing has become a staple for trade shows, retail displays, and event promotions. For marketers and small business owners, achieving high impact quickly depends on understanding banner printing turnaround time and efficient proofing. To stay aligned with best practices, focus on planning a banner project, selecting roll up banner materials, and ensuring print-ready file formats. Strong design choices and a clear custom banner design, plus accurate color management and thoughtful finishing options, amplify legibility and brand consistency. With the right workflow, your banners look sharp on the floor and maximize ROI.
In other words, this portable signage service blends design, production, and logistics to produce eye-catching pull-up displays. Consider terms like portable display printing, exhibition signage manufacturing, and banner stand creation to align with related searches. From planning to delivery, the emphasis shifts to efficient project management, fast turnaround options, and durable hardware for easy setup. Other LSIs such as display graphics production, banner stand fabrication, and print-ready asset preparation help you explore suppliers using varied terminology. Using varied terminology and contextual clues can help you compare services while preserving branding and impact at events.
Understanding Turnaround Times for Custom Roll Up Banner Printing
Turnaround time for banners isn’t a single number; it’s a spectrum influenced by proofing, production, and finishing. When you plan a Custom Roll Up Banner Printing project, you’ll typically see three main stages: proofing and approval, printing and production, and finishing and shipping. Acknowledging these steps helps you set realistic deadlines and manage stakeholder expectations.
To optimize the process, focus on the banner printing turnaround time from the outset, including time for digital proofs and color checks. Build in buffer for revisions, and consider rush options if you’re facing tight timelines. Also, ensure you’re using print-ready file formats so the proofing stage doesn’t become a bottleneck and the production phase proceeds smoothly.
Planning a Banner Project: From Goals to Timeline
Planning a banner project starts with a clear objective: where the banner will be used, who will see it, and the key message you want to convey. This informs design choices, size, orientation, and the level of detail needed. By outlining these factors early, you set a foundation that reduces revisions during later stages.
Next, build a practical timeline that aligns with your event or promotion schedule. Include milestones for design, proofs, production, and delivery, and specify who signs off at each stage. Considering factors like roll up banner materials and finish options early helps prevent delays and keeps your project on track.
Custom Banner Design and Print-Ready File Formats: Best Practices
A strong banner design blends legibility, branding, and impact. When focusing on custom banner design, prioritize high-contrast typography, concise messaging, and visuals that read well from a distance. Ensure your layout respects safe zones and bleed so the final print isn’t clipped or misaligned.
Preparing print-ready file formats is essential for a smooth run. Use embedded fonts or outlines, select CMYK color space, and provide a high-resolution file that meets the printer’s requirements (for example, PDF/X-1a or TIFF/PNG). Supplying a soft-proof helps catch issues before production begins and can significantly reduce the risk of last-minute changes.
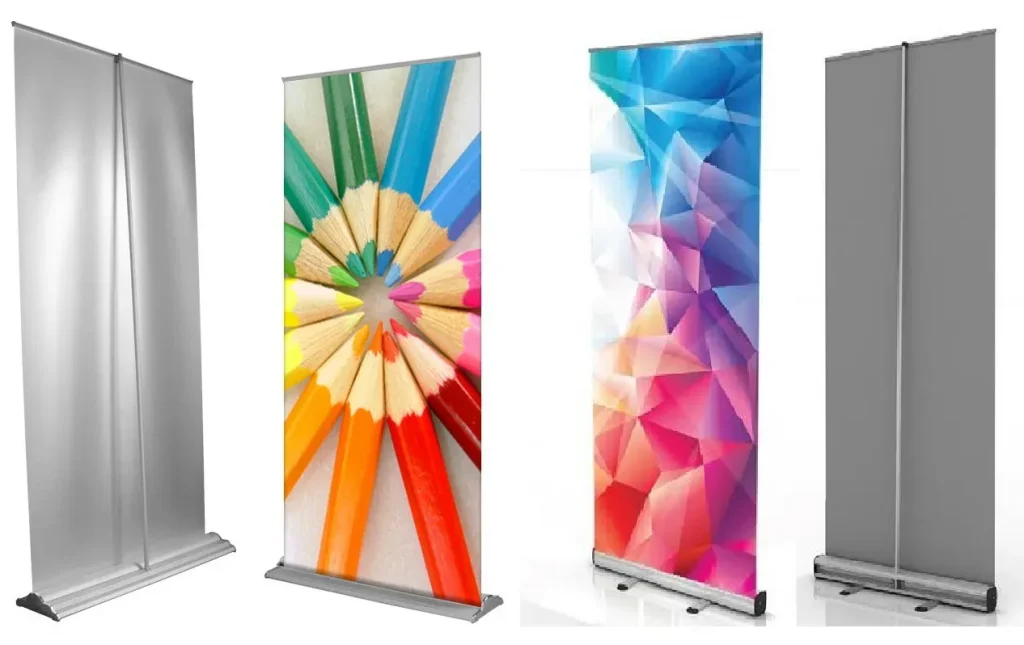
Roll Up Banner Materials: Vinyl vs Fabric and Finishes
Roll up banner materials drive durability, appearance, and cost. Vinyl banners are durable, water-resistant, and generally cost-effective for short-term events. They offer strong color reproduction and quick turnaround, making them a practical choice for many campaigns.
Fabric banners provide a premium look with a matte finish and wrinkle resistance, which can be advantageous for repeated use or venues with challenging lighting. When selecting materials, also consider finishing options such as pole pockets, magnetic bases, or retractable mechanisms—these decisions affect transport, setup time, and overall presentation.
Color Management, Proofing, and Quality Assurance for Banner Printing
Color accuracy is central to a successful banner. Engage in color management by requesting ICC profiles and soft proofs, and, when possible, obtain a physical proof on the chosen material to gauge how colors will render under typical event lighting. This step helps ensure your branding looks consistent across displays.
Quality assurance during proofing minimizes surprises on press. Provide precise brand colors using Pantone values when possible, check image resolution at banner size, and review for legibility and alignment. If any gradients or complex imagery are involved, run a test print to confirm smooth transitions before committing to a full run.
Budgeting, Scheduling, and ROI for Custom Roll Up Banner Projects
Effective budgeting considers material quality, printing resolution, and finishing details. Aligning these factors with your planned timeline helps you estimate total costs accurately and avoid unexpected expenses. If banners will travel between locations, factor in weighs, packing materials, and shipping fees to the overall plan.
Finally, evaluate the return on investment (ROI) of your banner program. A well-planned banner design, timely production, and reliable delivery can boost brand visibility, draw attendees, and support campaign goals. By integrating planning a banner project with clear deadlines and quality controls, you maximize impact while minimizing waste and delays.
Frequently Asked Questions
What is Custom Roll Up Banner Printing and how does banner printing turnaround time typically unfold?
Custom Roll Up Banner Printing blends design, production, and logistics to deliver professional banners. Typical turnaround under standard conditions is 3–5 business days, with stages: proofing/approval (a few hours to 2–3 business days), printing/production (1–3 days; rush options 24–48 hours at a premium), finishing and shipping (1–3 days). Factors such as quantity, material, print technology, finishing, and artwork complexity can affect timing; building in a buffer is wise, especially during peak seasons or large runs.
How does custom banner design influence the outcome of Custom Roll Up Banner Printing and how can I optimize for faster turnaround?
A strong custom banner design uses clear typography, high-contrast color, and safe margins to ensure readability at distance. For Custom Roll Up Banner Printing, use CMYK at 300 dpi, maintain a 1 inch safe zone, and include a 0.125–0.25 inch bleed. Provide print-ready artwork with embedded fonts or outlines and consistent branding. These practices minimize revisions, support color accuracy, and help achieve quicker proofs.
What are the essential steps in planning a banner project for Custom Roll Up Banner Printing?
Key steps include: define the objective and audience; choose size and orientation; select material and finish; plan the budget; create print-ready artwork with safe margins and bleed; build a timeline; review proofs for color and layout; and prepare installation instructions. Following this workflow reduces delays and aligns with event schedules.
When selecting roll up banner materials for Custom Roll Up Banner Printing, what should I consider for durability and color?
Consider vinyl versus fabric. Vinyl is durable, water-resistant, cost-effective, and quick to print, suitable for short-term events. Fabric offers a premium look with less glare and better crease resistance for repeated use but may involve longer production. Finishes (pole pockets, bases, or retractable systems) and indoor vs. outdoor use also influence durability, weight, and turnaround.
Which print-ready file formats should I use for Custom Roll Up Banner Printing to minimize errors and delays?
Use common print-ready formats such as PDF/X-1a or high-resolution TIFF/PNG. Ensure fonts are embedded or outlines, use CMYK color space, and target at least 300 dpi at banner size. Include proper bleeds and safe zones, provide soft-proof PDFs when possible, and confirm the preferred file format and color management requirements with your printer.
How does planning a banner project affect proofs and turnarounds in Custom Roll Up Banner Printing?
Planning a banner project sets expectations for proofs, color accuracy, and delivery timelines. Request a physical proof on the chosen material when possible, provide precise brand specs (Pantone values or CMYK values), and confirm deadlines and quantities up front. A well-planned project reduces revisions and helps you meet event dates.
| Topic | Key Points | Notes / Examples |
|---|---|---|
| Overview | Banner printing blends design, production, and logistics to deliver high-impact signage quickly without sacrificing quality. | Aims for a smooth workflow and professional on-floor performance. |
| Turnaround Times | Three stages: proofing/approval, printing/production, finishing/shipping. Typical 3–5 business days; rush options available at a premium. | Build in extra time for delays; peak seasons can affect schedules. |
| Planning a Banner Project | Define objective; size/format choice; material/finish; budget; print-ready artwork; timeline; proofs; installation plan. | Common sizes: 31.5×78, 33×80; decide single vs. double-sided, portrait vs. landscape. |
| Design & File Prep | Create legible, brand-consistent designs; ensure high-res imagery; safe zones/bleeds; correct file formats; embedded fonts/outlines; soft proofs. | CMYK color space, 300 dpi; include bleed 0.125–0.25 inch; verify fonts and assets. |
| Materials | Vinyl (durable, affordable) vs Fabric (premium look, wrinkle resistance); finishing options (pole pockets, bases, retractables). | Indoor use and transport considerations; weight and durability matter for reuse. |
| Print Quality & Color | Color management, ICC profiles, soft/physical proofs; Pantone specs; test prints for large banners. | Lighting affects color; plan proofs under typical event lighting. |
| Cost & ROI | Balance speed with quality; total cost includes packaging, installation, and potential replacements. | Consider reuse, durability, and long-term value. |
| Printer Selection | Choose printers with relevant experience, materials/finishes, clear proofing/communication, and transparent pricing. | Compare timelines and quotes; ask about sustainability and warranties. |
| Practical Planning Checklist | Define objective/audience; confirm size/material/finishes; prepare print-ready artwork; request proof; set production/shipping timelines; plan installation. | Use this as a reference during project execution. |