Designing Embroidered Patches blends artistry with practical technique, turning logos and emblems into wearable identifiers through deliberate color, size, and stitch decisions. This guide shares embroidered patches color tips alongside the principles of embroidery patch color theory to help you balance contrast and legibility on different fabrics. We also cover patch size guidelines to help you scale designs for hats, jackets, and bags while preserving detail. Understanding the stitch count for patches is essential to balance appearance, durability, and cost, and it ties directly into a plan for custom embroidered patches design. By applying these strategies, you’ll create patches that look professional, convey the right message, and endure through wear and washing.
From another angle, design work for patches is a form of fabric artwork, where patch art concepts, badge design ideas, and needlework techniques translate artwork into thread. This LSI-friendly framing reflects Latent Semantic Indexing principles and uses terms like embroidered badge creation, fabric patch embellishment, and decorative stitching to signal related concepts readers may search for. Focus areas include color balance, density, and backing selection, all of which influence durability and legibility in the final stitched patch. By approaching the topic with allied terms such as patch embroidery techniques, texture, and finish, you help readers find the information they need while aligning with search intent.
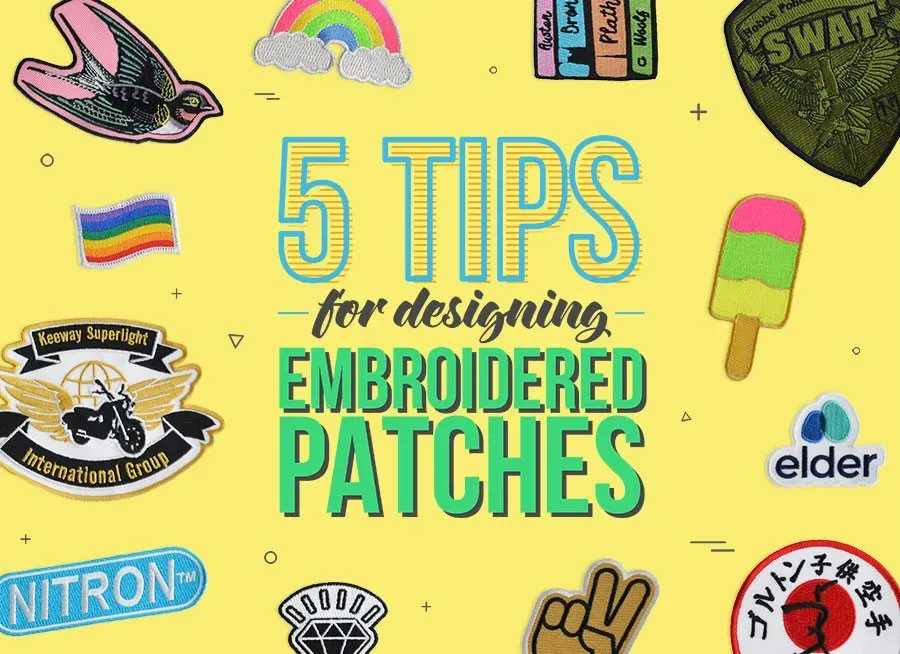
Designing Embroidered Patches: Core Principles for Color and Size
Designing Embroidered Patches blends art and engineering. The color strategy is a foundational decision, shaping legibility, brand consistency, and overall impact on the garment or accessory. By starting with a defined brand palette and considering the patch’s typical context—dark fabrics, light fabrics, or busy environments—you can guide thread choices toward reliable contrast and visual cohesion. This focus ties directly into embroidery patch color theory, ensuring colors work together rather than compete for attention, while also paying attention to practical guidance found in embroidered patches color tips to avoid subtle mismatches after stitching.
Size then plays a critical role in how the artwork translates to fabric. Patch size guidelines help you preserve details without sacrificing readability, especially when the patch will be applied to caps, jackets, or bags. A balanced approach to shape, edge treatment, and color blocking helps maintain a professional look while controlling stitch density and backing requirements. In practice, this means planning how color blocks scale with size and how density might shift when moving from a digital concept to a stitched reality.
Color Theory and Contrast: Practical Tips for Embroidered Patches
A strong understanding of embroidery patch color theory informs every design choice. Warm and cool tones, complementary color pairs, and analogous palettes influence how the patch reads at a distance. When you’re considering embroidered patches color tips, validate swatches on fabric similarly to the final product to anticipate differences between digital samples and real stitching. This validation helps ensure your patch communicates the intended message clearly and stays visually appealing across lighting conditions.
Texture and thread characteristics also affect color perception. Rayon threads deliver bright, saturated hues with a glossy finish, while polyester threads offer durability and colorfastness for patches that endure frequent washing or outdoor exposure. For color stability, you might select UV-stable, color-baked threads to preserve hue; matching background colors helps keep the focus on the logo, and a defined border can frame the design for crisp color boundaries.
Sizing and Shapes: Patch Size Guidelines for Different Applications
Patch size guidelines drive how the artwork translates to real-world use. Small 1.5–2 inch patches suit hats and lapels but can lose detail, while 3–4 inch patches accommodate more complex artwork with greater visibility. The patch shape—circular, shield, rectangular, or custom—also influences layout decisions and how text or emblem elements align with the edge. Planning ahead with size and shape in mind helps preserve legibility and reduces last-minute adjustments during production.
Different fabrics react uniquely to embroidery. Lighter canvases and twills behave differently from dense denim, so you may need to simplify line work or increase contrast to keep details legible. If there’s any doubt, request a digital mockup on the actual fabric to verify how color, density, and shape translate during stitching, ensuring the final patch meets both aesthetic and functional requirements.
Stitch Count and Density: Balancing Detail, Durability, and Cost
Stitch count for patches is a primary driver of appearance, durability, and cost. Too few stitches can blur edges; too many can drive up production time and backing requirements. When planning, consider how patch size and complexity affect the stitch count for patches. For example, a 2-inch patch with simple shapes might target roughly 250–500 stitches, while a 4-inch patch with intricate shading could exceed 1,000–2,000 stitches, depending on the technique and artwork.
Density and stitch type influence edge crispness and fabric behavior. Higher density yields sharper borders but can cause puckering if backing isn’t suitable. Selecting appropriate backings (tear-away vs. cut-away) and possibly a stabilizer can maintain edge integrity during washing and wear. Planning stitch plans that balance outlines (satin stitches) with fills (long-and-short fills) helps preserve legibility and reduces the risk of distortion.
Typography and Legibility: Designing Text on Patches
Typography must remain legible when the patch is viewed at arm’s length. Font choices, minimum text height, and contrast with the background determine readability. In practice, bold sans-serif fonts often translate well at smaller sizes, while highly decorative scripts may require larger sizes or simplification. When you design for custom embroidered patches, consider outlines or contrasting threads to enhance legibility and prevent hairline details from vanishing in dense stitching.
A practical approach is to simplify or modify fonts for stitching, prioritizing readability over decorative finesse. Spatial considerations, such as letter spacing and baseline alignment, help maintain a clean, consistent edge against the patch border. If text is critical to brand messaging, you may test multiple font treatments and sizes to identify the configuration that remains clear across fabrics and viewing distances.
Custom Embroidered Patches Design: Personalization and Brand Alignment
Custom embroidered patches design invites brands and organizations to tailor colors, shapes, and sizes for specific products or events. Offering variations for different clothing lines or membership levels can expand the patch program while preserving a consistent core emblem for brand recognition. This approach aligns with personalization goals and supports the concept of custom embroidered patches design as a flexible, scalable solution.
A structured design workflow supports successful customization. Start with a clear brief that includes focus keywords, color families, patch size guidelines, target stitch counts, and a deadline. Provide vector logos and reference images, and specify patch shape and backing requirements. Collaboration with a factory may also involve requesting a stitching-density report and a fabric color check, ensuring the final patches meet brand standards and production realities.
Frequently Asked Questions
What are embroidered patches color tips to maximize legibility when Designing Embroidered Patches on dark fabrics?
Start with your brand palette and ensure high contrast between thread colors and the fabric. Validate colors on a fabric sample similar to the final material, since thread hues can read differently from swatches. Apply color theory basics (complementary pairs for contrast, analogous colors for harmony, triadic schemes for vibrancy) and choose thread types (rayon for bright saturation, polyester for colorfastness). For durability or outdoor use, consider UV-stable threads and use a matched background or clean border to keep the focus on the emblem.
How do patch size guidelines affect layout and readability in Designing Embroidered Patches?
Patch size guidelines should match the intended use: about 1.5–2 inches for hats or lapels, and 3–4 inches for more detailed artwork. The patch shape also influences readability—circles emphasize central logos, shields accommodate text, and custom/oval shapes can be eye-catching with careful stitch planning. Always test on the actual fabric and consider a digital mockup to verify color, scale, and legibility before production.
What is the recommended stitch count for patches to balance detail, durability, and cost when Designing Embroidered Patches?
Plan stitch counts around size and detail: roughly 250–500 stitches for a 2-inch patch, 500–1,000 stitches for a 3-inch patch, and 1,000–2,000 stitches (or more) for a 4-inch patch with shading. Density affects edge sharpness and fabric puckering, so choose backing (tear-away or cut-away) and stabilizers to match density. Use satin stitches for outlines and fill stitches for large color blocks, and simplify small text or fine lines to preserve readability.
How does embroidery patch color theory influence color choices in custom embroidered patches design?
Embroidery patch color theory guides mood and visibility: warm vs. cool tones set different vibes, and strong contrast improves legibility from a distance—especially for team colors or bold logos. For custom embroidered patches design, tailor colors to specific products or events while maintaining a consistent core emblem for brand recognition. Consider variations for different lines or applications, with careful attention to how colors interact on final fabrics.
What is a practical workflow for turning a concept into a patch in Designing Embroidered Patches?
Follow a structured workflow: start with a concept sketch or vector artwork and keep colors in a defined palette; convert text to outlines and simplify gradients to solid blocks. Choose a patch size and shape, create a stitch plan (outlines in satin, large fills in tack or fill stitches), and generate a digital mockup on the target fabric. Review with stakeholders, revise as needed, then produce a swatch for color accuracy, density, and edge clarity before full production.
What quality assurance steps ensure consistent outcomes in designs for custom embroidered patches design?
Implement QC steps from the start: verify color accuracy with a calibrated color guide and run a test embroidery on the same fabric type. Perform a wash test, request a pre-production sample for high-volume runs, and check backing suitability and stitch density. If working with a factory, request a stitching-density report and a color check on fabric swatches to ensure consistency across batches.
| Topic | Key Points |
|---|---|
| Introduction |
Designing embroidered patches is both an art and a practical craft. The look is shaped by the artwork, color choices, size, and stitch density. For brands, clubs, events, or hobbyists, patches should be recognizable, durable, and valuable. This guide emphasizes how to optimize color, size, and stitch count to convey the right message, look professional, and stay within budget. |
| Color strategy |
|
| Texture and finish |
|
| Size considerations and patch shape |
|
| Stitch count and density |
|
| Typography and legibility |
|
| Design workflow: from concept to patch |
|
| Common mistakes and fixes |
|
| Embroidery patch color theory and customization options |
|
| Quality assurance and practical tips |
|
| Real-world guidance for designers and brands |
|
Summary
Designing Embroidered Patches is a blend of art and engineering. By balancing color strategy, size and shape, stitch density, typography, and a clear workflow, designers can create patches that look professional, wear well, and reinforce brand identity. Focused testing, accurate color verification, and thoughtful design choices help ensure patches communicate the intended message while staying within budget, whether for teams, brands, events, or hobbyists.