Learning how to attach embroidered patches can transform a garment, bag, or project by adding a personal touch, whether you’re personalizing a rugged denim jacket, updating a backpack for travel or school, or commemorating a sports team achievement with a distinct, durable badge. There isn’t a single right way; you can choose from iron-on patches, sew-on patches, or patch adhesives, depending on fabric type, weave, weight, care instructions, and the level of permanence you want, as well as how comfortable you are with heat, stitching, or glue-based methods. Each method brings its own steps, advantages, and potential drawbacks, but knowing when to use heat activation, traditional sewing, or an adhesive backing helps you understand how to apply patches in a way that balances speed, durability, and fabric integrity for long-lasting results. This introduction sets the stage for practical guidance that blends technique with fabric care, covering common scenarios from lightweight knits to heavy denim, potential pitfalls like puckering or fraying, and embroidered patch tips that help you select the right backing, edge finish, and reinforcement for longevity. From quick iron-on setups that save time to robust sew-on reinforcement and dependable patch adhesives for delicate or heavily worn areas, you’ll find a method that matches your project’s fabric, size, and care routine, and you’ll gain confidence in selecting the best approach for your desired look.
In plain terms, the craft of adding embroidered badges to textiles can be explored through a broader vocabulary that covers attaching patches by hand, heat-activated backings, or simple adhesive bonds, and this approach is grounded in Latent Semantic Indexing (LSI) principles. Think of patch placement, badge attachment, or fabric embellishment as a spectrum of techniques that share the goal of a secure, visually appealing mark that wears well over time. For designers and hobbyists, understanding related terms like iron-on transfer, sew-on stitching, and durable adhesives helps broaden options and adapt to different fabrics, from sturdy denim to delicate knits. Whether you’re optimizing for wash longevity, a lightweight garment, or a temporary project, the right terminology helps you search for targeted tips and product recommendations.
Choosing Between Iron-On, Sew-On, and Patch Adhesives: Durability, Convenience, and Care
Selecting the right method for attaching embroidered patches hinges on fabric type, wear expectations, and maintenance. Iron-on patches offer a quick, heat-activated option that works well on sturdy fabrics like denim and canvas, while sew-on patches prioritize lasting durability for frequent washing or heavy use. Patch adhesives provide a flexible, low-heat alternative, especially for delicate textiles or temporary projects, but may require extra care after application.
Understanding the pros and cons of iron-on patches, sew-on patches, and patch adhesives helps you plan for longevity and appearance. Iron-ons are speedy but may need reinforcement with stitching for long-term wear. Sew-ons deliver the strongest bond, particularly on items that endure regular washing. Adhesives add convenience for special fabrics or quick fixes, though their durability varies with washing and heat exposure.
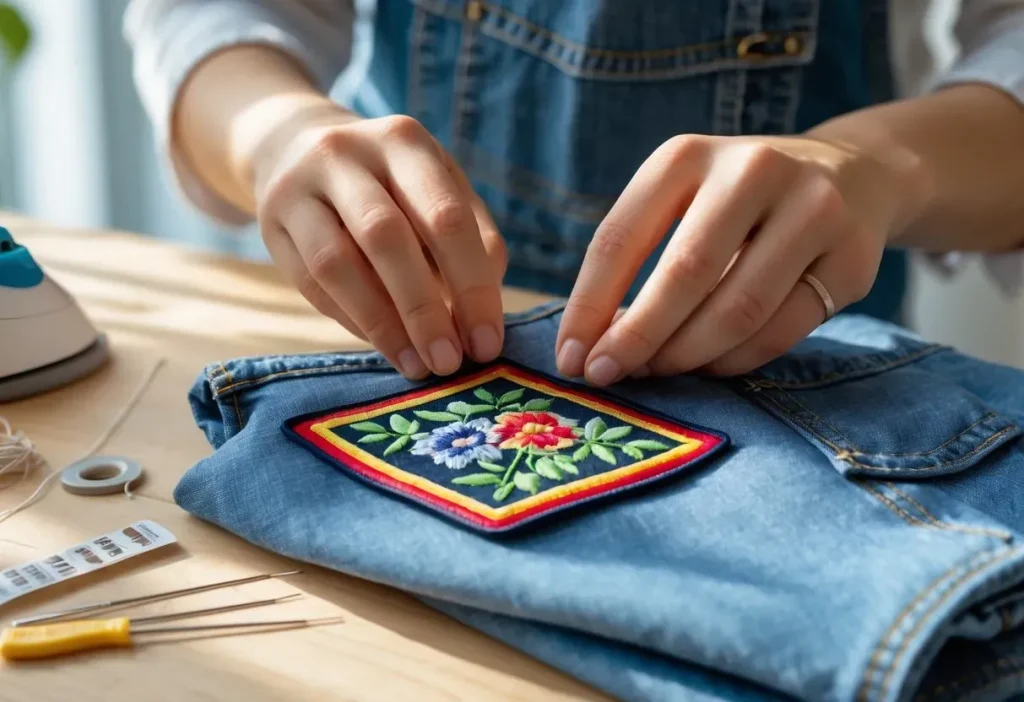
How to Attach Embroidered Patches: how to attach embroidered patches with Iron-On, Sew-On, and Adhesives
Whether you’re working with denim, knit, or delicate fabrics, the process starts with choosing the method and gathering the right tools. This guide integrates iron-on patches, sew-on patches, and patch adhesives so you can compare steps side by side and select the best approach for your project. Keeping the patch clean, aligning edges, and protecting the fabric with a pressing cloth are universal tips that set a solid foundation for a professional finish.
For each method, start with proper preparation—clean fabric, careful placement, and stable support. Iron-on patches require heat and pressure with a suitable iron or heat press, sew-on patches require precise stitching to secure edges, and adhesives demand proper curing time. By understanding how to apply patches across these techniques, you’ll gain the flexibility to tackle a wide range of fabrics and designs.
Patch Adhesives Deep Dive: When and How to Use Glue or Backing
Patch adhesives offer a convenient, non-heat option for fabrics sensitive to high temperatures or situations where sewing isn’t feasible. Fabric glue and double-sided adhesive provide different bonding profiles, so choosing the right adhesive depends on the patch size, fabric texture, and washing frequency. Always check the product instructions and select a bond that supports your garment’s care needs.
Adhesive patches shine in quick-turn projects or delicate textiles, but they may require longer cure times and could be less durable under frequent washing or hot dryers. To maximize longevity, follow cure times precisely, press with even pressure during application, and consider reinforcing edges with light stitching if you anticipate heavy use.
Fabric-Specific Guidance: Denim, Knits, Silk, and Challenging Textiles
Fabric type dictates the most reliable attachment method. Denim and canvas tolerate heat well, making iron-on patches a practical choice when you need speed and a secure initial bond. For knits, silks, or fine fabrics, you might prefer sew-on patches to avoid heat damage and puckering, or use a stabilizer to support the patch.
When working with delicate textiles, always test on a small, inconspicuous area and use a lower heat setting or a protective pressing cloth. Patch adhesives can be useful for lightweight fabrics, but verify that the adhesive is compatible with the garment’s care instructions. Matching thread colors for sew-on patches also helps achieve a seamless look that lasts.
Finishing Touches and Embroidered Patch Tips: Edges, Threads, and Aesthetics
The finishing stage can elevate a patch from functional to polished. Edge finishing, thread color choice, and stitch type influence both durability and aesthetics. Embroidered patch tips include using a tight border stitch, reinforcing at corners, and ensuring the thread blends with the garment for a seamless appearance.
Even with iron-on patches, light hand stitches along the edges can reduce edge lift and improve longevity. For sew-on patches, consider a reinforced center if the patch covers a large area. By applying these finishing techniques, you preserve the patch’s design while extending its life across multiple wears and washes.
Care, Maintenance, and Longevity of Patches: Washing, Drying, and Re-application
Proper care protects patches from premature wear. Washing inside out in a gentle cycle, avoiding high-heat dryers, and air-drying where possible helps preserve the bond whether you used iron-on patches, sew-on patches, or patch adhesives. Regular inspection lets you catch lifting edges early and re-seal or re-stitch as needed.
Turn garments inside out prior to washing to minimize friction on patch edges and reduce wear on adhesive backing. If you notice wear after several cycles, re-attach patches with a method suited to the fabric and patch type—this could involve reinforcing stitches, reapplying adhesive, or performing a light heat press as appropriate.
Frequently Asked Questions
How to attach embroidered patches quickly using iron-on patches?
Iron-on patches provide a fast, heat-activated option for attaching embroidered patches. Position the patch, set your iron to a suitable high heat for cotton, use a pressing cloth, and press for 30–60 seconds with firm, even pressure. Let it cool, test the edges, and reinforce with a few stitches if desired.
What steps are involved to attach embroidered patches with sew-on patches for durability?
Sew-on patches offer the most durable attachment. Place the patch, pin to prevent movement, thread with a color-matching thread, tie a small knot, and stitch around the edges with a tight running or whip stitch (about 2–3 mm apart). Finish securely from the inside, and consider optional reinforcement stitches behind the patch for extra longevity.
Are patch adhesives a good option for how to attach embroidered patches, and what should I know about their longevity?
Patch adhesives are convenient for delicate fabrics or quick fixes, but durability varies with washing. Clean the fabric surface, apply the adhesive to the patch backing, press firmly for 30–60 seconds, and allow the adhesive to cure as directed (often 24 hours). After curing, inspect edges and add discreet stitches or backing if needed for a stronger hold, and always follow care labels.
How do I apply patches on different fabrics and decide between iron-on patches, sew-on patches, or adhesives?
Choose the method based on fabric type and wear expectations. Iron-on patches work well on sturdy fabrics like denim or canvas; sew-on patches are best for frequent washing or heavy use; adhesives suit delicate fabrics or temporary fixes. Check patch instructions, protect delicate textiles with a pressing cloth, and avoid high heat on sensitive fabrics.
What embroidered patch tips help ensure a long-lasting finish when attaching patches?
Pre-wash fabrics when possible to reduce post-application shrinkage. Use edge finishing or a few small stitches along the edge for durability, add internal reinforcement on larger patches, and allow patches to cool before washing. Match thread color to the fabric to maintain a seamless look.
What common issues occur when attaching embroidered patches and how to fix them?
Common issues include edges lifting, patches not sticking, or color bleed from heat. If edges lift, reapply heat with a pressing cloth or add stitches around the border. If a patch won’t stick on delicate fabrics, switch to sew-on or a fabric-specific adhesive and follow care instructions. For fraying or loose threads, use a tight whip stitch around the edge and avoid high heat that can damage colors.
| Aspect | Summary |
|---|---|
| Preparation and Tools | Gather clean fabric, patches, scissors, needle and thread (matching color), matching or invisible thread, ironing cloth, a small iron or heat press, and patch backing or fabric glue for adhesives. |
| Iron-On Patches | Position patch, set appropriate iron heat, use pressing cloth, apply heat for 30–60 seconds, test edges when cool, and optionally sew a few small stitches for extra security. |
| Sew-On Patches | Position and pin patch, thread to match fabric or patch, tie a knot, stitch around edges with evenly spaced stitches, finish securely, and optionally add internal reinforcement. |
| Patch Adhesives | Prepare surface, apply adhesive to patch back, press firmly for 30–60 seconds, allow curing (often 24 hours), reinforce if needed, and follow care instructions for washing. |
| Choosing the Best Method | Iron-On for quick results on sturdy fabrics; Sew-On for durability with frequent washing; Adhesives for delicate fabrics or temporary fixes. Consider fabric type, patch size, aesthetics, and care needs. |
| Care & Maintenance | Wash inside out on gentle cycle, cold water; avoid high-heat dryers; air-dry or tumble on low if permitted; re-seal or re-stitch as needed; inspect patches regularly. |
| Troubleshooting | Edges lifting: reinforce with light stitching or reapply heat with a pressing cloth; patch not sticking on delicate fabrics: switch to sew-on or adhesive; fraying: use a tight whip stitch; heat discoloration: adjust heat or switch methods. |
Summary
Mastering how to attach embroidered patches is a practical skill that lets you personalize clothing, bags, and projects with character and durability. This guide outlines three reliable methods—iron-on, sew-on, and patch adhesives—each with its own steps, pros, and care considerations. Choosing the right method depends on fabric type, wash frequency, and desired permanence. Iron-on patches offer quick results on sturdy fabrics, while sew-on patches deliver lasting durability through reinforced stitching. Adhesive patches provide a temporary or delicate-fabric option when heat or needlework isn’t ideal. To get the best long-term results, prepare the fabric and patch, follow the specific step-by-step instructions, and consider finishing touches like reinforcing stitches or a protective pressing cloth. Regular care includes washing inside out, avoiding high heat, and inspecting patches for wear. With practice, you’ll master applying patches so they stay secure and look professional through countless wears and washes. Start with a simple project to build confidence, then tackle larger patches with intricate edges or bold colors. By understanding the tools and methods, you can confidently achieve a neat, durable, and visually appealing result when you attach embroidered patches.